Create a New Approval
Creating a New Approval in Approver is as easy as filling out a simple web form in the system.
*The following steps also apply to creating a new approval from a Tracker Project.
New Approval in Approver

In the ERA/Approver tab, select the New Approval link in the header bar. A blank New Approval form will open.
The first step is to fill in some basics about the job.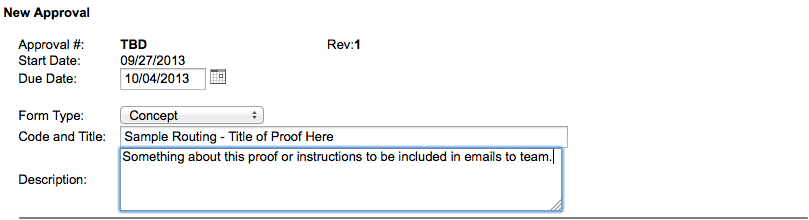
Descriptions and instructions for these fields are as follows:
- Approval # – A number is generated by the system upon creation of the job.
- Rev – This is the Revision number. New jobs begin with a Revision number of 1.
- Start Date/Due Date – The start date is the date the job is created. The due date must be filled in and be in the following format: MM/DD/YYYY.
- Form Type – Select the type of approval.
- Code & Title – Enter a Title of the new Approval. *This field is required to save the form.
- Description – Use this field to put any special descriptions or instructions for the users who will be reviewing the job.
Next you will load your file for proofing.
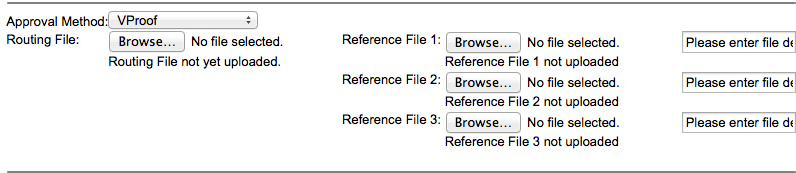
Select an Approval Method from the drop-down menu. There are two types of approval methods which can be used for reviewing and approving a job in ERA:
- Browser Comments – This selection allows members of the review team comment and approve/reject a job directly in the browser window. The reviewer will also be able to download a non-editable copy of the routing file.
- Check-in/Check-out – This selection allows members of the review team to check out and download the routing file to their systems. The file can then be edited and uploaded back to ERA. The reviewer would then user a Browser Comments interface to provide the final approval/rejection of the job.
- vProof – This method allows users to use the web to review, annotate, and signoff on approvals.
Select a Routing File to upload for the Approval. The Routing File will be added to the Approval after the user selects the Save for Later or Begin Routing buttons at the bottom of the page. The uploaded file can be replaced until routing begins.
Upload any additional Reference files to assist users during their review and sign-off. Brief descriptions of the reference files can be included in the text field to the right of the file upload.
The next section of the page is for assigning team members to the Approval form.
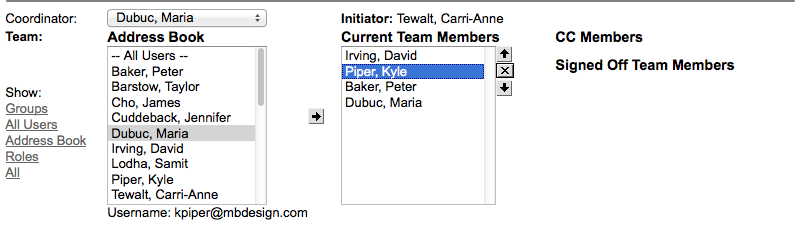
- Initiator – The Initiator is the individual who creates the new job. This field is not editable. The Initiator and Coordinator can be the same person.
- Coordinator – Assign a Coordinator by selecting a user from the Coordinator drop down menu. The Coordinator is ultimately responsible for the management, monitoring and routing of the job through ERA.
- Team – To create a review team, select a name and/or team in the Address Book column and click the arrow button pointing to the Current Team Members column. Use the Up and Down arrow keys to position the team in the order needed for sequential routing.
Once your team is chosen, you can then determine the options for a routing.

- Sequentially Route Job - left unchecked, all users will be able to review/approve at the same time. If checked, the approval will route in the order of users listed.
- Notify user if job is advanced to next approved - This will send an email to a user if they are skipped during the approval cycle.
- Notify before due date - Choose the number of days and who to notify when the proof is getting close to the due date. Left unchecked, no notification will go out.
- Remind reviewers - A "past due" notification will go out every day for the # of days listed.
- Notify Coordinator on Comment - send an email for each comment or user approval on a routing.
- Notify Team on Comment - sends the entire team a notification about each users comments.
- Prevent file downloads for this approval - Blocks users from being able to download the original file, annotated file, and print file from vProof application.
Once the New Approval form has been completed, users have two options for saving the form to the system, choosing either Save for Later or Begin Routing.

Save for Later will leave the form in a pending state until Begin Routing is selected.
Begin Routing submits the form and sends notification to the approvers.
Selecting either Save for Later or Begin Routing will take the user to the My Approvals section of the ERA.