Creating Groups
Creating Groups
Starting on the Admin tab from top tabs.
Click Groups from the header menu.
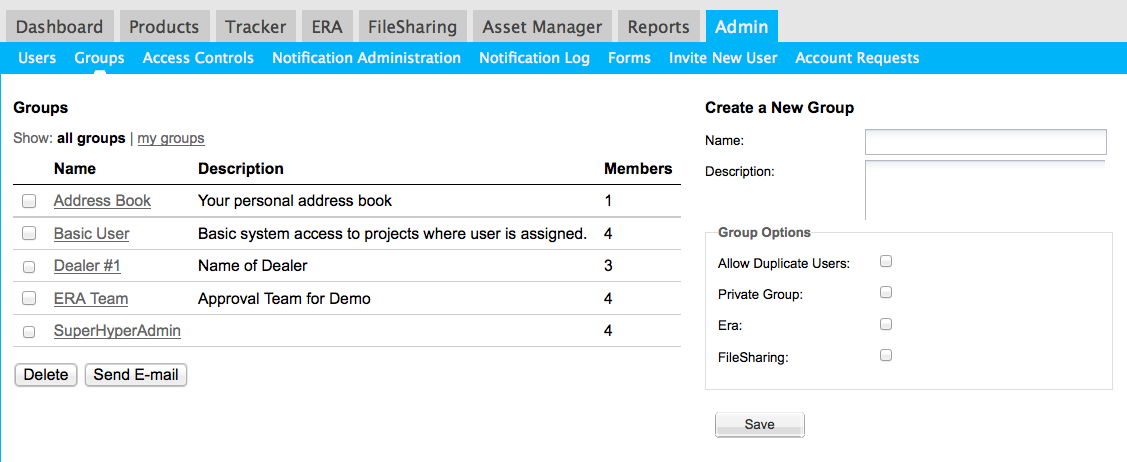
Groups will immediately display the current list of groups and the option to create a new group.
To create a new group:
1. Enter a name - this will be the link displayed on screen.
2. Add a Description - this is useful for reference
3. Group Options - Select options for where this group should be displayed.
Duplicate Users - Check this option if a user can be listed more than once.
Private Group - Only your user can see/use this group
ERA - Show this group in the ERA Team selection options
Filesharing - Show this group in the Filesharing assignment window.
Click SAVE. Next you will want to assign users.
You can assign users 2 ways; from the Group page or within each User Profile.
Add User from Groups
Click the Group Name to assign users directly. This page will show a list of users already assigned and an option to Remove or Add additional users.
To add users, simply select a user from the drop down list.

Click ADD to enter user into group.
Add User from Profile
Click User from main Admin header.
Locate a user from the list.
Click the user name link to access their profile.
From the profile window, you will see a full listing of all groups available.
Check each group that should be available for this user.
Click SAVE.