Access Controls
The Access Control system is one of the most powerful (and dangerous) aspects of the WBD system.
Access Control changes should be thoroughly considered and tested before being introduced in a production environment. Please always test your proposed changes on your test site before introducing Access Control changes into production.
Rules to Creating Access Controls
An Access Control rule either allows or denies a specific privilege in a specific application to a specific set of users.
The Access Control system is composed of a list of rules. Since each rule is very specific, you need to setup a number of rules, which the system will compose to calculate each user’s effective privileges as they navigate the system.
The system combines the rules in the order they are defined. A common pattern is to deny all privileges to everyone, then to start adding back privileges to specific groups as necessary.
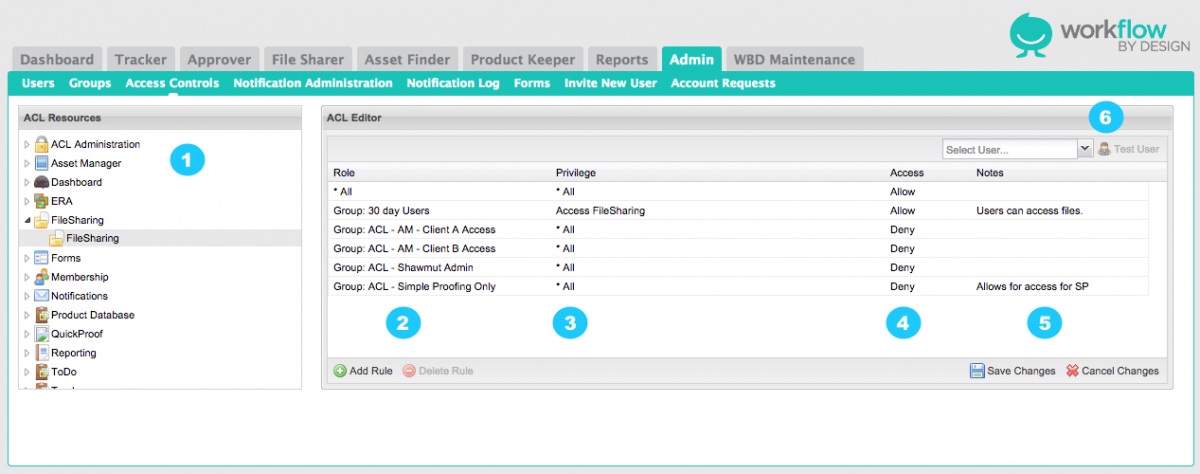
1. Resource - essentially a predefined “area” of the system. Each application is organized into a set of nested resources, which allow you to assign Access Controls that apply to each of its different areas.
For example, Tracker breaks down its Access Controls by tab. Each tab becomes an Access Control resource, allowing you to setup tab-specific Access Controls. Tracker also supports a couple of standard resources (one is called Projects, for example) to allow you to control access to general Tracker functionality that is not specific to any particular tab.
2. Role - simply a group of people to which an Access Control rule may apply. Available roles vary be application.
All applications allow you to apply Access Controls by group. Any group may have access control rules applied to it.
In addition, certain applications also provide more specific types of roles that allow you to leverage application-specific functionality.
In Tracker, you can assign Access Controls by team position. Teams are defined on a project-by-project basis, so this means that as a user switches between projects in Tracker, the user’s effective privileges will change.
Note that there is always an All option, which allows you to apply a given rule to all roles (i.e., any user in the entire site).
3. Privileges - define the particular functionality being allowed by each rule. For example, in a Tracker Grid Tab, there is are privileges for “Create”, “Delete”, and “Edit”.
Note that there is always an All option, which allows you to apply a given rule to all privileges available in the current resource.
4. Access - determines if the role and privilege chosen will allow or deny the user access.
5. Notes - Administrator can enter text here to explain access or usage for that particular role/privilege.
6. Test User - Choose a user from the list to verify access.