Schedule Reports
You have the option to run reports directly from the Reports tab OR choose to schedule a report to run at certain times. Scheduling reports allows you to determine day, time, and/or frequency the report runs. You also have the ability to send the report to other users, eliminating the need for them to go into the system to generate a report.
Start on the Run Reports screen to see available reports for scheduling.
Click “Schedule” to launch Report Scheduler.
*Use the [?] for exact details on filling in each section of the report scheduler or follow the instructions outlined below.
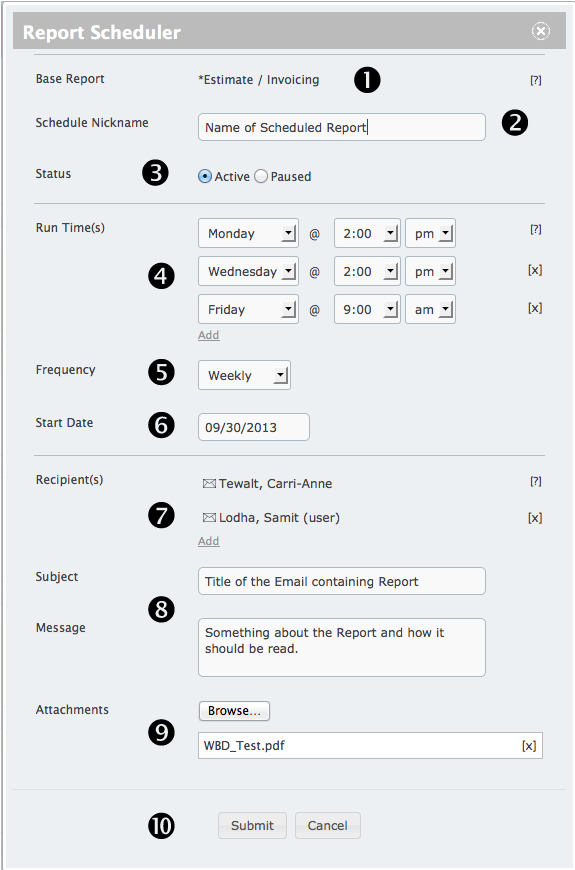
1. Showing the Base Report name or the report being used in the schedule.
2. Nickname or name of the schedule for the base report.
3. Choose whether the schedule should be active or paused.
4. Run Time(s) - List day(s) and time for each run.
5. Frequency for the run times.
6. Start Date - choose an option from the pop-up calendar.
7. Next choose who should get a copy of the scheduled report. Your user will be included by default.
8. Enter a Subject and Body to be included in the email notification.
9. Attachments allow you to include instructions, macros, or other aides in working with the report.
10. Submit/Cancel schedule.
Scheduled reports are highlighted green. Those with an active status will show an active schedule link in the top right corner of each highlighted row. Clicking active schedule will show a grid view of all scheduled reports.
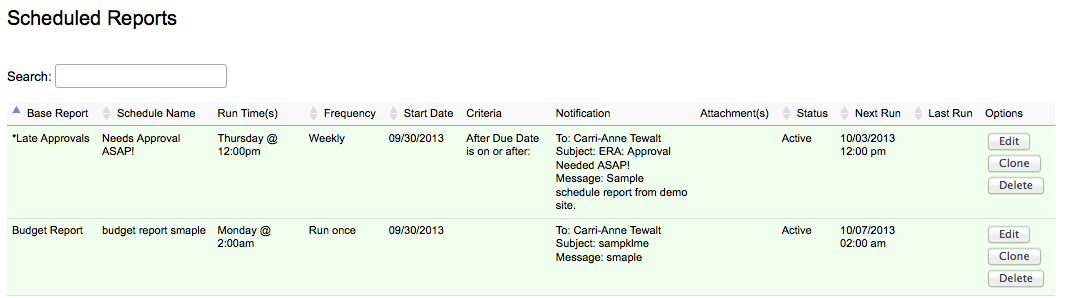
This view will showcase all details entered in the Report Scheduler as well as the Next Run and Last Run.
Each schedule will allow the option to Edit, Clone, or Delete the scheduled report. Clicking Edit or Clone will direct users to the same scheduled reports window, only that option will keep existing data.
*Once a report is scheduled, it will continue to run as scheduled until paused, edited, or deleted.